Monday, August 31, 2020

KLM Designs Friends With Nature

  KLM Digital Designs has some really adorable images and if you haven't checked them out you really should. They have both digital images and Photopolymer stamps.


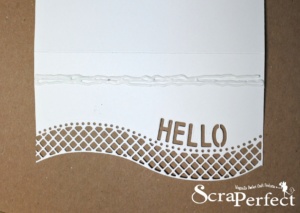
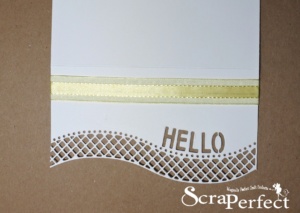
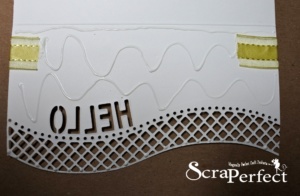
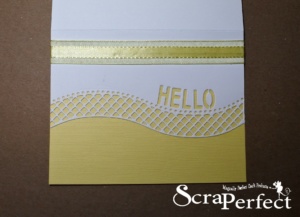
One of the new images in digital stamp form is the Friends with Nature.  I used the digital image and printed it onto some Cryogen card stock and colored with Copics.  I cut it out using a die.  For my card today, I layered some blue and checked card stock onto my card base of 6x6.  I used a die and cut out some additional die cuts. I attached them to the card front.  Then using some foam dots, I added the  colored image. I used a sentiment that also comes with the  Friends with Nature


Copics used:
Blues - B97, B95, B93, B91
greens - YG45, YG41
browns - E27, E25, E23, E21


A closer peek at the image:


You can find more inspiration at KLM DesignsKLM Digital Design Team and KLM Digital Designs on the Facebook Fan page from the design team.


Thanks for stopping by,


Thursday, August 27, 2020

Scrapping 4 Fun Challenges #174

 We have a new Challenge at Scrapping4funChallenges.


The Theme for Challenge 174 - Add a Bicycle (or anything on wheels)

If you like to play along and join us in the fun, hop over to Scrapping4funChallenges.

Our lovely Sponsors are


Here is my card:


The stamp is from Polkadoodles.

Don't forget to join in the fun at Scrapping4funChallenges.


Thanks for looking and Happy Crafting!!!!!


Crafting Of Hue Di's Digi Stamps

 I'm here today to share a card I made using a digi stamp set from Di's Digi Stamps. Di's Digi Stamps is the sponsor at Crafting Of Hue this week (August 24 - August 28). 


I used the digi stamp called " Take My Hand" :


Copics used: 
skin - E11, E00, E000, R20
hair - E37, E33, E30
pinks - R85, R83, R81
blues - B97, B95, B93, B91
browns - E27, E25, E23
E44, E42, E40
greys - C5, C3, C1

A closer peek at the colored image:


Hope you will check out the facebook group for more inspiration from the various sponsors. 


KLM Designs Nesting Bird

 KLM Digital Designs has some really adorable images and if you haven't checked them out you really should. They have both digital images and Photopolymer stamps.


One of the new images in digital stamp form is the Nesting Bird.  I used the digital image and printed it onto some Cryogen card stock and colored with Copics.  I cut it out using a die.  For my card today, I layered some yellow and blue card stock onto my card base of 6x6.  I used a die and cut out some additional die cuts. I attached them to the card front.  Then using some foam dots, I added the  
Nesting Bird. I used a sentiment that also comes with the  Nesting Bird


Copics used:
Blues - B39, B14, B12, B06, B05
greens - BG99, BG93, G21, YG23
purples - BV17, BV13, BV11, BV000
pinks - R89, R85, R83, R81
yellows - Y38, Y18, Y04, E15


A closer peek at the image:


You can find more inspiration at KLM DesignsKLM Digital Design Team and KLM Digital Designs on the Facebook Fan page from the design team.


Thanks for stopping by,


Saturday, August 22, 2020

Sketch Saturday

 Hi Everyone,

Sketch Saturday's 2020 sponsor is Riley and Company


Riley and Company is the original home of snark.
Please stop by their website and 
check out the great selection of sentiments to tickle your Funny Bone!

We are grateful for our sponsor's support.

Our winner of this weeks' challenge will win a prize from our sponsor!


Here is the sketch #624:


I used  a sentiment and image Spring Flowers from Riley and Company:


We would love it if you'd join in with our sketch this week.  You can enter at Sketch Saturday.


KLM Designs Cupcake Gnome

 KLM Digital Designs has some really adorable images and if you haven't checked them out you really should. They have both digital images and Photopolymer stamps.


One of the new images in both digital stamp form is the Cupcake Gnome.  I used the digital image and printed it onto some Cryogen card stock and colored with Copics.  I cut it out using my Scan N Cut.  For my card today, I layered some orange and printed card stock onto my card base of 6x6.  I used a die and cut out some banner die cuts. I attached them to the card front.  I also cut out an oval from blue card stock to put behind my colored image.  Then using some foam dots, I added the  Cupcake Gnome. I used a sentiment that also comes with the  Cupcake Gnome


Copics used:
skin - E11, E00
beard - W3, W2, W1
greens - YG03, YG01, YG00
blues - B45, B41
shoes - E44, E42, E40
Cupcake - YR14, YR12, BG57, BG53

A closer peek at the image:


You can find more inspiration at KLM DesignsKLM Digital Design Team and KLM Digital Designs on the Facebook Fan page from the design team.


Thanks for stopping by,


Friday, August 21, 2020

Polkadoodles

Hello All, 

I'm super excited to be sharing with you my Christmas Joy Fold Card. I used an image called  "All Wrapped Up - Winnie Christmas Wishes from Polkadoodles. I also used some digital papers from Winnie Christmas Wishes Papers 1 & Papers 2.


For my card I used my Scan N Cut to cut out the image, I then colored the image using copics.  I created a Joy Fold Card today, here is the way I made it. I started with 2 6x6 card blanks.  On 1 of the card blanks I cut off 2 1/2 inches from one side.  For the other card blank, I cut it done to a 4x4 card.  I printed out some digi papers and cut one down to a 5 3/4 square and layered onto some teal card stock.  I adhered this to the 6x6 side of the card blank.  I then attached the 4x4 card blank to the 6x6 side about 1 inch from each side.  Then I took another digi paper and cut it down to 3 1/4 x 6 and layered it onto some teal card stock.  Then I adhered it onto the smaller side of the 6x6 card blank.  I then used another digi paper to decorate the 4x4 card blank.  After each side was decorated, I adhered the colored image onto the 4x4 card front.  I added some ribbon and a bow and some pearls. 

Here is a closer peek at the colored image:


Copics used:
Skin - E11, E00, E000, R20
hair - E35, YR24, YR23, YR21
clothes - R35, BG49, BG45
reindeer - E25, E23, E21
presents - YG25, Y11, Y13, BG49, BG45, R35


I HOPE you will join us this week at the 


I'm entering this in the following challenges:


Happy Crafting!!!


Outlawz Festive Fridays

 Friday has arrived! And so has a new Outlawz Festive Friday's Challenge. Here is my DT card using an image by Paper Nest Dolls, our sponsor this month.  


Our themes this week are Female Birthday, Fall/Autumn,  Christmas, Anything Goes!


Here's my card using Emma With Gift:


Copics used:
skin - E11, E00, E000, R20
hair - E35, YR24, YR23, YR21
pinks - RV55, RV52
teal - BG57, BG53
yellows - Y15, Y13, Y11
browns - E44, E42, E40


Check out the The Outlawz Challenges Fan Facebook page for some more inspiration.


Thursday, August 20, 2020

Sheepski Designs Fuzzy Friends


I'm excited to show you my creation for Sheepski Designs.  This is another post using one of their wonderful images called "Fuzzy Friends". 


Items Used:
Copics: E37, E35, E33, E31, RV55, Y11, YG03
Pearls
Oval dies


Check out our Facebook page for some more inspiration using Sheepski Design images.


Friday, August 14, 2020

Stampers Delights Anime New Release

 Hello. I'm super excited to be sharing a card  I've designed using one of the gorgeous new Anime Stampers Delights Digital Stamps. You can find these fabulous new images in the new release section at the Stampers Delights Store. To see more creations using these new images please head over to the Stampers Delights Blog and the Stampers Delights Facebook Group


Here is my card using Special Moments:


I colored my image using copics (see list below). I cut out my image using a die.   I then layered some pink and checkered cardstock on top of my card base of 6x6.  I then attached my image. I added a few pearls to the top right corner of the card.  And a bow on the left side.


Here's a closer peek at my colored image:


Copics used:


skin - E11, E00, E000, R20
hair - E27, E25, E23, E21
pinks - RV55, RV52


I'm entering the following challenges:


 If you love these images as much as me please stop by the new release section on the Stampers Delights Store. There is a Progressive Challenge you can join in with over at the Stampers Delights Facebook Group.


Don't forget to head on over to the blog or Facebook page to see some of the wonderful inspiration the team has provided for you this week.  


We will see you again at the beginning of the month when Janice releases her newest images.


See you then......thank you for stopping by...


Important Links for you......


Thursday, August 13, 2020

Scrapping 4 Fun Challenges #173

 We have a new Challenge at Scrapping4funChallenges.


The Theme for Challenge 173 - Anything Goes

If you like to play along and join us in the fun, hop over to Scrapping4funChallenges.

Our lovely Sponsors are

Image may contain: text that says 'OUR DIGITAL STAMPS Discaver iscaver them all!'


Here is my card using The Queen Bee:


Don't forget to join in the fun at Scrapping4funChallenges.


Thanks for looking and Happy Crafting!!!!!


Wednesday, August 12, 2020

ScraPerfect Easy and Quick Hello Card

 Hi everyone! I'm here today to share a tutorial for creating a quick Hello card!

Create the card base, and cut all the layers needed for the front and the inside. My card base is 4 1/4 x 5 1/2.


Next use the die  and place it where I wanted it to cut and ran it through my die cutting machine.

Some ribbon would look good across the top of the card front, so I used some of the Best Glue Ever with a No-Clog Writing Cap, and put a line across the card front.  I used my finger to smooth it out some so it wasn't very thick.  Set this aside to dry.


Once the glue turned from white to clear and tacky, place the ribbon on it and smooth it down.


Using some of the Best Glue Ever with a No-Clog Writing Cap, adhere the layer piece behind the front of the card.  The No-Clog Writing Cap gave me ultimate control and the ability to place only tiny dots on the delicate cut out section.

I decided to add a bow to the front, so I used some Best Glue Ever with a No-Clog Writing Cap, and attached it where I wanted it.


That's it for today - until next time. Happy Crafting with ScraPerfect!!


Crafty Gals Corner #210

It's time for another challenge with us at the  Crafty Gals Corner

This week we are letting out creative Juices flow with Challenge #210 - Summer Time Fun

Crafty Gals Corner Challenges are monthly.

Each crafter may only submit 3 projects per challenge

Our Sponsors for this challenge are:


Prize ~ 2 Digital Images


Stamper's Delights
Prize ~ 3 Single Digital Images


Image may contain: text that says 'Twinkle LANE DESIGNS'
Twinkle Lane Designs
Prize: Two Digital Images
 & Two Coordinating Digital Paper Sets 


Here is my project using  Chibis Photo from Stampers Delights:


The image is colored with these copics:

Skin - E11, E00, E000, R20
hair - C9, C7, C5, C3
clothes - RV55, RV52
camera - BG57, BG53


Hope you enjoyed your visit

Come see all the DT projects at Crafty Gals Corner Challenges and enter your creations. We'd love to see them......