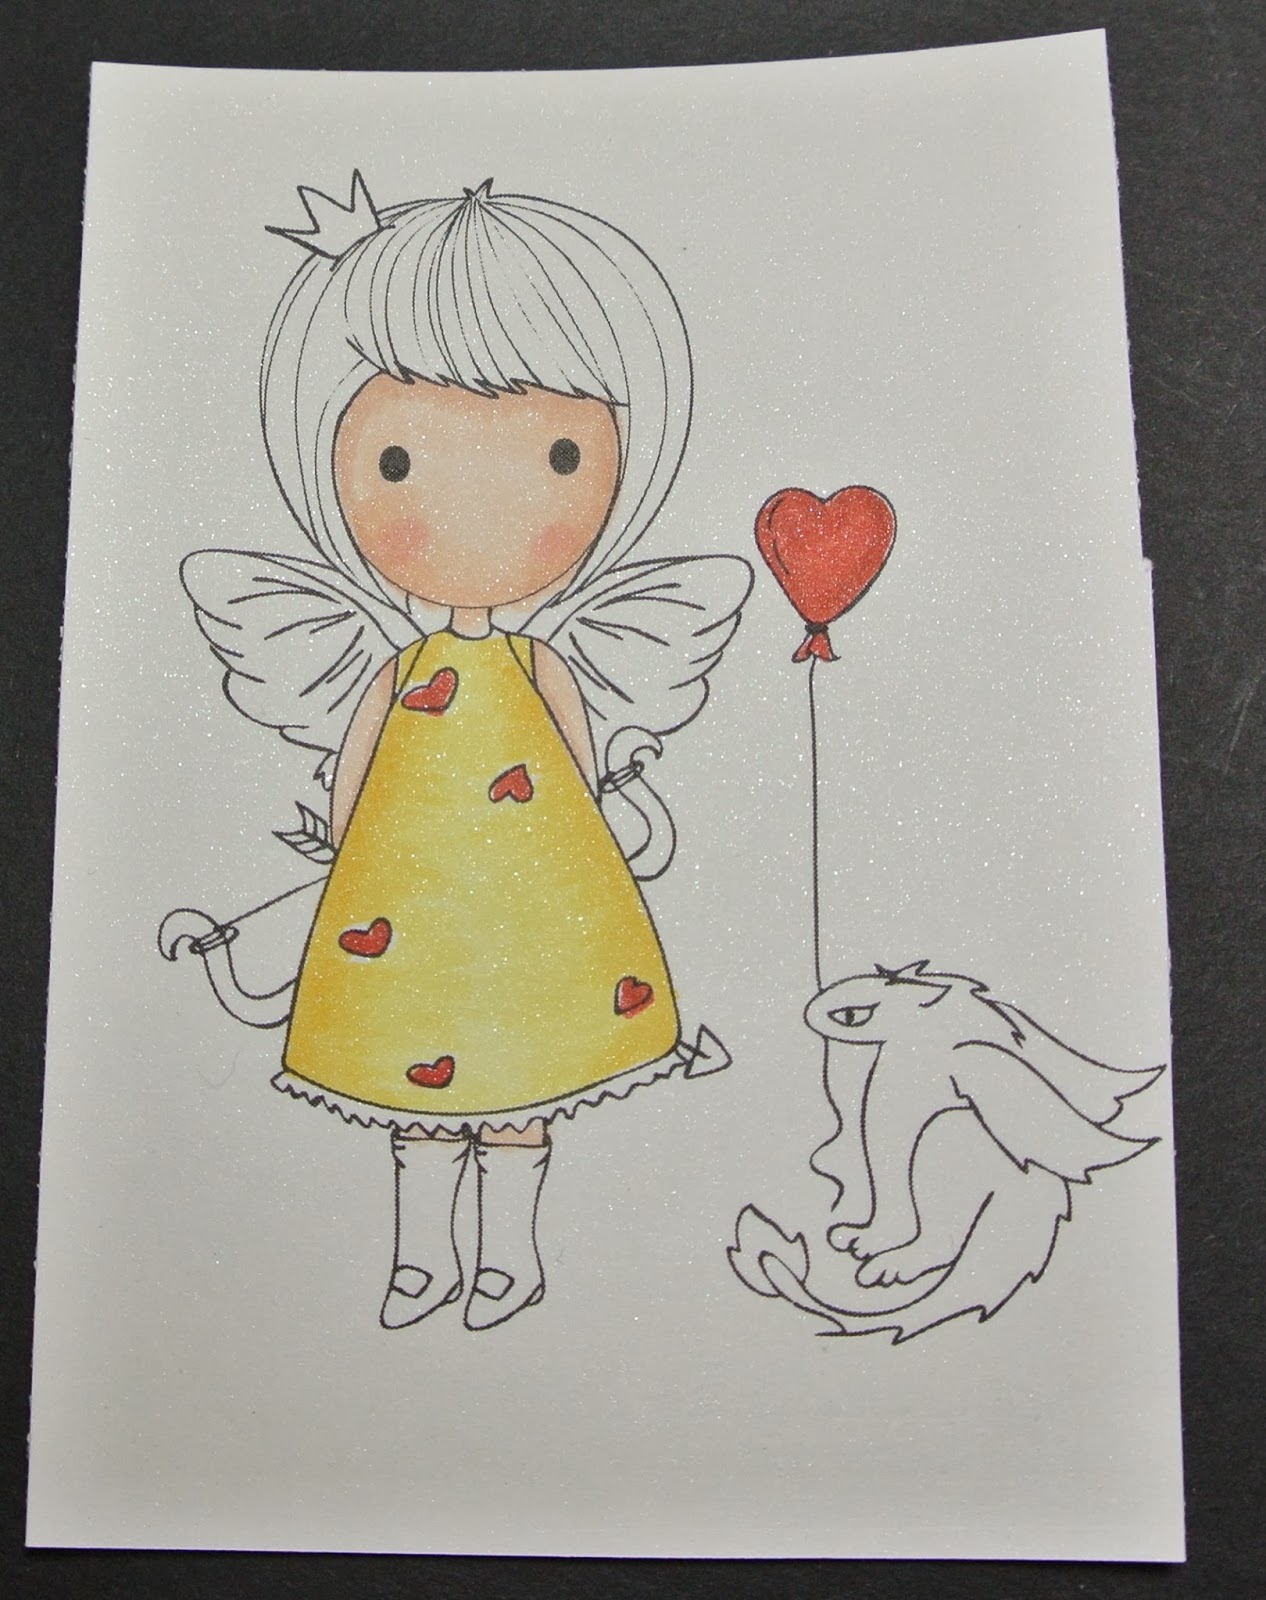
HI Everyone!!! Dawn here to show you the steps I took to color the
image
Valentine Eris using Copics. I color from dark to light and use a flicking technique.
Step 1: Using E11, E00, E000 and some R20 for the cheeks, color the skin.
Step 2: Color the dress using Y11, Y13, Y15, R24.
Step 3: Color the hair using E27, E25, E23, E21.
Step 4: Color the crown using Y13.
Step 5: Color the bow using E25.
Step 6: Color the wings using Y11 and BV11 using the feathering technique.
Step 7:Color the shoes using C5, C3, C1, C0.
Step 8: Color the dragon using C5, C3, C1 and I grounded my image by using W5, W3, W1.
This is the final colored image. Hope you were able to follow the steps to color in Valentine Eris.


