Friday, November 30, 2018

The Project BIn's North Pole


The Project Bin is a stamp company that makes snappy Sentiments.  I was able to use the "North Pole"  stamp set to create my project. 


Card recipe:
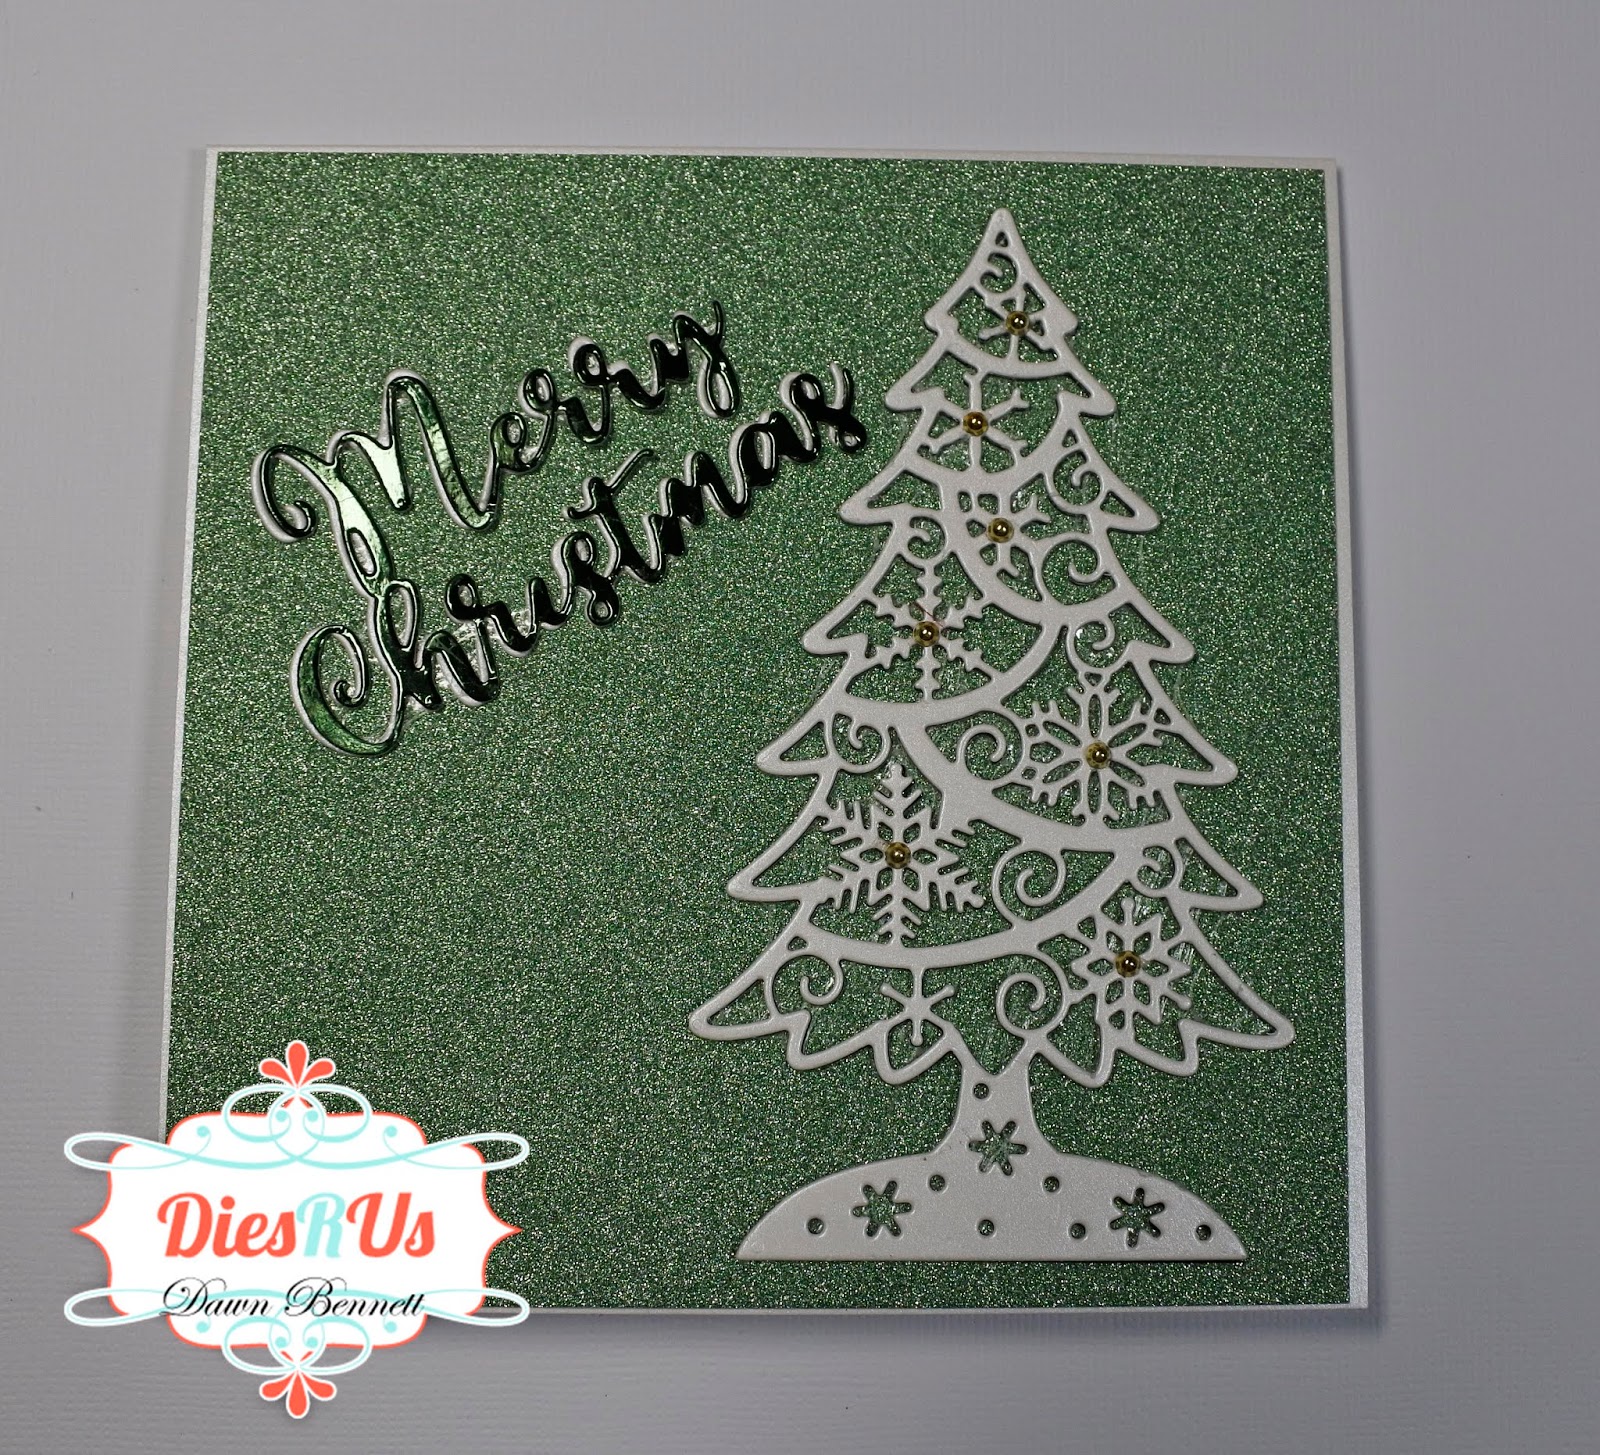
Cardstock: white CS, shiny green cardstock and red glitter cardstock from my stash
Creative Expressions Craft dies - Scalloped Lattice Frames
Creative Expressions craft dies - Poinsettias
pearls

A closer peek at the image and sentiment:


Check out The Project Bin Blog for some more inspiration using "The Project Bin" sentiments....


Outlawz Festive Fridays


Friday has arrived! And so has a new Outlawz Festive Friday's Challenge. Here is my DT card using an image by Sandi Huggett and Sandi's Samples, our sponsor this month. Our themes this week are Winter Birthday,Missing You, Anniversary/Wedding, Christmas, and Anything Goes!


I colored in the image using copics.  The colors I used are:  C9, C7, C5,C3, C1, C0, C00, E25, E23, E21


Check out the The Outlawz Challenges Fan Facebook page for some more inspiration.


Friday, November 23, 2018

Outlawz Festive Fridays


Friday has arrived! And so has a new Outlawz Festive Friday's Challenge. Here is my DT card using an image by Sandi Huggett and Sandi's Samples, our sponsor this month. Our themes this week are Friend Birthday,Day at the Beach, shopping, Christmas, and Anything Goes!


I colored in the image using copics.  The colors I used are: C3, C1, C0, C00, Y11


Check out the The Outlawz Challenges Fan Facebook page for some more inspiration.


Dies R Us Merry Christmas


Hello, fellow paper crafters!  It's Dawn with you today with my next post for Dies R Us.  

Today I have a Christmas card to share with you.


Assemble the dies you are going to use and cut them out using cardstock of your choice.  I cut the tree out 2 times using green mirrored cardstock and once using Ivory pearl cardstock.  I cut the Merry Christmas out 2 times, once in green mirror cardstock and again in ivory pearl cardstock.


layer the 3 tree cutouts on top of one another, I used glue to adhere them together.


I cut my card base to 5 1/2" square.  I then layered a piece of  5 1/4" square green glitter cardstock on top of my card base. 


I added my tree to the right side of the card front.


I then added the sentiment, I offset the 2 cut outs to show the ivory behind the green to make it stand out more.  I also added some gold dots to the center of each snowflake on the tree.


Supplies found in the Dies R Us Store:

Tutti Designs - Dies - Ice Crystal Fir


Don't forget to come join in the fun at the Dies R Us Challenge Blog. There's a new challenge theme offered on the 1st and 15th of each month and one lucky randomly drawn winner will receive a gift voucher prize to the Dies R Us Store. For your convenience, all the important Dies R Us links are provided below.
We hope to see you again tomorrow!

Wednesday, November 21, 2018

Digi Doodles Rosie Tinsel Berry


Hello all my friends!!!! I'm excited to be here today, on this fabulous Wednesday,  to show you a creation using Digi Doodle Studios images.  For my card today, I have used the wonderful "Rosie Tinsel Berry" digital image.


Card Recipe:
Copic markers : Greens - YG25, YG23, YG21
Pinks - RV25, RV23, RV21
Blues - B06, B04, B02
Reds - R37, R35, R32, R30
Browns - E25, E23, E21
Doodlebug Christmas Town paper pad
CC Designs scalloped Ovals dies
Pearls


A closer Peek at my colored image:


Check out "Digi Doodle Studios Blog" for more inspiration using "Digi Doodle Studios images.....

Check out our Facebook Page "Digi Doodle Studios" to share your creations, find all the challenge info/new release info, join in with the fun and to see all the inspirational projects from the DT.

We have a NEW Challenge Blog, The challenge for November is "Christmas/Winter"......


Tuesday, November 20, 2018

Sheepski Designs Huddle


I'm excited to show you my creation for Sheepski Designs.  This is another post using one of their wonderful images called "Huddle". 


Items Used:
Copics:  C9, C7, C5, C3,  R37, R35, R32
CC Designs Pinky Rectangle Dies


Check out our Facebook page for some more inspiration using Sheepski Design images.


Monday, November 19, 2018

LeAnn's World 101 Sassy Sally and Decorating LeAnn


I'm here on this fabulous Monday with my post for LeAnn's World 101

I have 2 cards to share with you today.

I was able to use the wonderful "Sassy Sally" image from LeAnn's World 101 etsy store today on my first card. 


I printed out the image and colored it in using copics (see below).  I used a die to cut out the colored image and for the mat behind it. I layered some blue CS onto my card base of 6x6.  I attached my image on the front of my card.  I then added some ribbon and a bow. I added some pearls to finish off my card.

A closer peek at my colored image : 


Copics used - Skin - E11, E00, E000, R20
hair - E27, E25, E23, E21
Blues - B97, B95, B93, B91
pinks - RV34, RV32, RV00
browns - E44, E42, E40

For my 2nd card, I used "Decorating LeAnn". 


I printed out the image and colored it in using copics (see below).  I used a die to cut out a window from my red CS. I layered the red CS over my colored image. I then attached that to my card base of 6x6.  I then added a bow. I added some pearls to finish off my card.

A closer peek at my colored image : 


Copics used - Skin - E11, E00, E000, R20
hair - E27, E25, E23, E21
reds - R37, R35, R32
Greens - YG67, YG63, G20


Check out LeAnn's World 101 Facebook group for more inspiration. 

Thank You for stopping by today.


Saturday, November 17, 2018

Die Cut Divas Snowmen Selfie


I am here on this fabulous Saturday with my  post for Die Cut Divas.  The sponsor for this month at Die Cut Divas is  Sheepski Designs! This month's Challenge theme is "Anything Goes". 


I used the image called "Snowmen Selfie" from Sheepski Designs.  I used a die to cut out my colored image and for the mats behind it.  I also used a die to cut out the snowflakes. 


Come and join in with all the fun at Die Cut Diva's challenge for this month.  The challenge theme is "Anything Goes"..... 

Until next time......


Friday, November 16, 2018

Merry Christmas

Hello, fellow paper crafters!  I'm here with you today with my next post for Dies R Us.  

Today I have a Christmas card to share with you.


Assemble all the dies you are going to use and cut the pieces out using the card stock of your choice.  I chose to use purple for my poinsettias and green for the leaves. I cut the poinsettias out 2 times.


For my card base, I cut a piece of gold card stock to 5 1/2 x 11 and a 5 1/2 x 5 1/2 square.  I scored the long piece at 5 1/2 and folded on score line. I then scored a diagonal on the front part of the base. (see photo to see what I am talking about).


I attached the 5 1/2 square to the diagonal on the base layer.

I then cut some squares out of the gold and purple cardstock to layer on my card front and inside of the card.

I then assembled the poinsettias together and attached one to the card front and the other to the card inside.

I added the Merry Christmas cut out to the card front.


Thermoweb - Zots Clear Adhesive Dots - Large 1/2


Don't forget to come join in the fun at the Dies R Us Challenge Blog. There's a new challenge theme offered on the 1st and 15th of each month and one lucky randomly drawn winner will receive a gift voucher prize to the Dies R Us Store. For your convenience, all the important Dies R Us links are provided below.

We hope to see you again tomorrow!


Outlawz Festive Fridays

Friday has arrived! And so has a new Outlawz Festive Friday's Challenge. Here is my DT card using an image by Sandi Huggett and Sandi's Samples, our sponsor this month. Our themes this week are Birthday Balloons, Friendship, Celebrate, Christmas, and Anything Goes!


I colored in the image using copics.  The colors I used are: RV34, RV32, RV11, RV10, RV00, E44, E42, E40.


Check out the The Outlawz Challenges Fan Facebook page for some more inspiration.


The Project BIn's North Pole


The Project Bin is a stamp company that makes snappy Sentiments.  I was able to use the "North Pole"  stamp set to create my project. 


Card recipe:
Cardstock: white CS, designer cardstock from my stash
ribbon
pearls

A closer peek at the image and sentiment:


Check out The Project Bin Blog for some more inspiration using "The Project Bin" sentiments....


Tuesday, November 13, 2018

SSS Giggle Box Bestie

As a part of the Scrapbook Stamp Society DT , I get to work with some of the wonderful My Besties images.  


For my first card today, I was able to work with the adorable Giggle Box Bestie Img 217.


I colored her in using copics. I then used a scalloped oval die to cut her out and for the mat behind her. I made a 5 1/2 " twisted easel card base. I layered some blue and pink onto my card base and the inside. I then added my matted image. I added some snowflakes.  Then, I added some pearls  and a bow.
Copics used:
skin -  E04, E11, E21, E00, E000, R20
hair - E27, E25, E23
pinks - RV34, RV32, RV11, RV00, RV000
blues -  BG09, BG07, BG05, BG02
browns - E44, E42, E40
greens - YG67, YG63, G20
reds - R37, R35, R32

A closer peek at my colored image:


Check out the Scrapbook Stamp Society for more inspiration......